

Learn How to Export Your Art from Canva as a PDF with Crop Marks and Bleed.
While Canva is built for screen-ready designs, not print-ready graphics, you can make a best effort at printing your work by adding crop marks and bleeds. Exporting print-ready designs in Canva is straightforward once you know how. In this tutorial, we’ll walk you through the process — from setting up your design correctly to exporting your file as a PDF. Follow these steps to ensure your design is as ready as possible for professional printing. Click here to go to the bottom for a video walkthrough.
What is a bleed, and why do I need it?
A bleed is an extra margin added around the edges of your design that extends beyond the final trimmed size. This extra area is necessary because when your printed design is cut to its final dimensions, slight shifts or inaccuracies in the cutting process can occur. The bleed ensures that there are no unwanted white borders or unprinted edges along the perimeter of your design, resulting in a clean, professional finish.
It’s also a good idea to keep text and other important information away from the edges of your art – a good rule of thumb is 0.25″ inset minimum.
1. Prepare Your Design with Bleed in Canva
Before exporting your design, make sure that you’ve accounted for bleed — the extra area around your design that prevents white edges from showing after trimming. To enable bleed guides from the File menu. Select Settings, then check the option to “Show print bleed.”
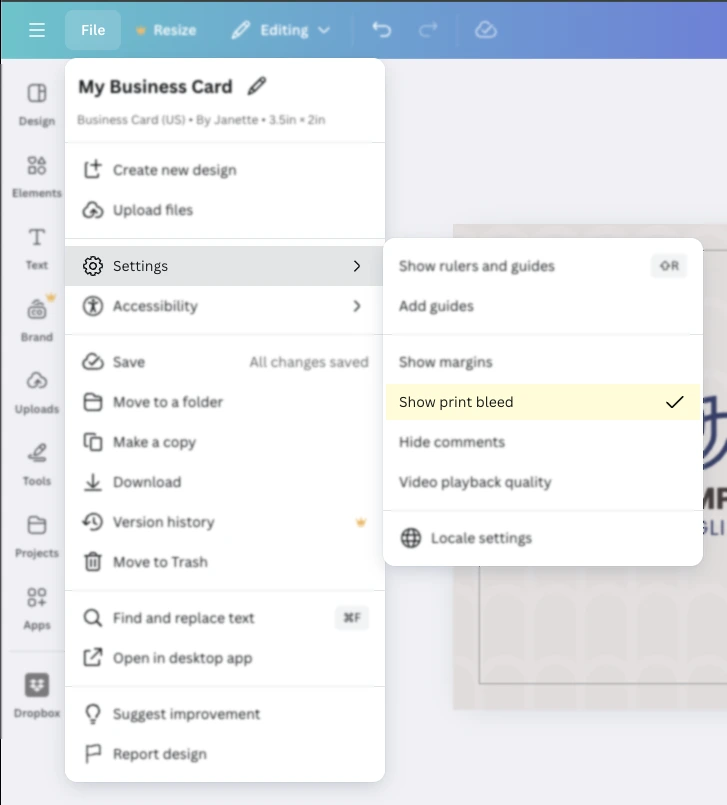
Now, you can see where you need to extend the background of your design:

Extend any colors, images, and graphics past the cut line by about 0.125″ – 0.25″
2. Access the Download Settings
When your design is ready, it’s time to export your file with the necessary print settings.
Step-by-Step:
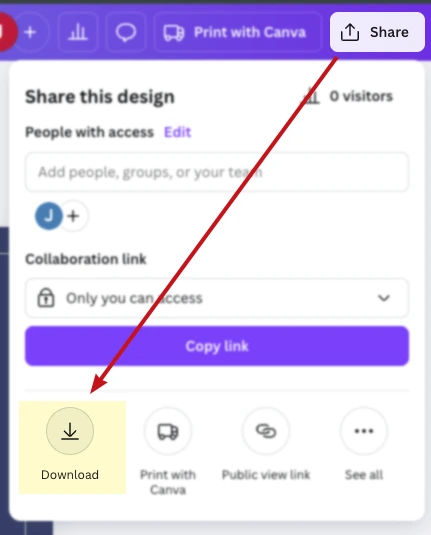
- Click on the “Share” Button:
In the upper-right corner of your screen, click on the Share button. - Select “Download”:
From the drop-down menu, click on Download.
3. Choose PDF Print and Bleed Settings
Now you’ll set up your file for export with the correct settings.
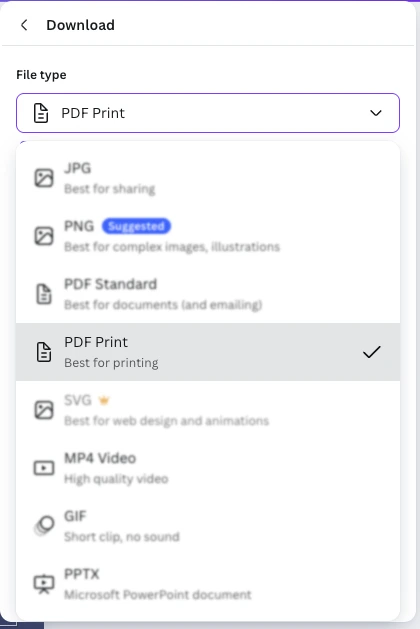
- Select File Type – PDF Print:
In the download settings, click the file type drop-down and choose PDF Print.
- Enable Crop Marks and Bleed:
Look for the checkbox labeled Crop Marks and Bleed. Make sure it’s checked. These options ensure that your design includes the extra bleed area and the marks necessary for trimming. - Verify Other Settings:
You may wish to Flatten the PDF if it’s complex. You can select all pages, or just some. The best color profile is CMYK, but with a free plan, you will need to use RGB. Be sure to save these download settings for next time!

4. Download Your Print-Ready PDF
After confirming your settings, click Download, and you are done! Send the PDF file to your local printer, and if all your graphics are high-resolution, you’ll get professional results.
Learn more about resolution: click here for our guide to image resolution
Watch the Video
More of a video learner? Watch us add crops and bleeds in Canva below:
Exporting your art from Canva as a print-ready PDF with crop marks and bleed is straightforward when you follow these steps. By ensuring that your design extends into the bleed area and by enabling crop marks during export, you can be confident that your printed project will look professional and polished.